How to Create Digital Activities: Drag and Drop Matching (Part 4 – Google Slides)
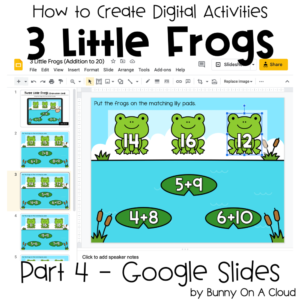
This post shows you how to put together a 3 Little Frogs drag and drop activity in Google Slides. It is a continuation from Part 1, which is the preparation part.
To create this activity in TpT Easel, check out Part 2.
To create this activity in Boom Cards, check out Part 3.
Note that this activity is only self-checking in TpT Easel and Boom Cards. The Google Slides version is not.

Creating the activity in Google Slides
1. Start a new presentation
In Google Slides, under ‘Start a new presentation’, click on ‘Blank’.

2. Change the slide size.
The default slide size is Widescreen (16:9). I’m going to change it to 4:3 since we’ve already created the flat backgrounds in 4:3. You can go with 16:9 if you created the flat backgrounds in 16:9.
Go to File > Page setup, and choose Standard 4:3 from the dropdown menu.

3. Add backgrounds
Delete all the default text boxes that are on the slide (I forgot to do that before I took the screenshot).
Click on ‘Background’. It’s on the sub toolbar on the top.
Click Image > Choose Image, then select the first flat background created in Part 1.

4. Add in all 5 flat backgrounds created in Part 1
After adding in the first background image, insert a new slide.
On that new slide, add background again (repeat step 3). Do this until all 5 flat backgrounds created in Part 1 are added.

5. Add 1 movable frog
Go to Insert > Image, then choose 1 of the movable frog images created in Part 1 then insert it into the slide.

6. Resize and duplicate to get 3 frogs
Resize the first frog to your desired size, then copy and paste so that you have 3 frogs altogether.
Arrange them in the holding area, i.e. the white translucent box.

7. Align and distribute the frogs
To make the frogs look neater, go to Arrange > Align > Middle and then Arrange > Distribute > Horizontally.

8. Copy and paste the 3 frogs onto every slide
With the frog laid out nicely, copy and paste them into every slide. We have to change the frog numbers in the next step, but just lay them out as placeholders for now.

9. Use ‘Replace image’ to substitute in the frogs with the correct numbers
With all the placeholder frogs in place, use ‘Replace image’ (in the sub toolbars) to put in the frogs with the correct numbers that you planned for in each slide.


10. Test out the activity to make sure there are no errors.
The activity part is complete. Play through all the slides to make sure all the numbers are right and correct errors, if any.

11. Rename the Google Slides
Once you have checked through the activity, rename the slides.

Next Steps
Now that the slides are complete, go on to Part 5!

