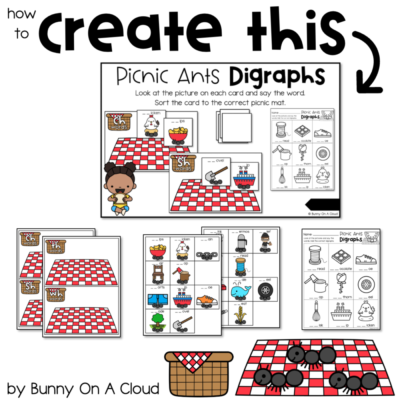
How to create this: Picnic Ants Digraphs (Sorting Center)

Planning the Resource
Write a draft… something like this:
Skill: Digraph Sounds
Activity: Sorting Center.
Theme: anything from Picnic Kids clipart
Fun Activity Name: Picnic Ants Digraphs
CH Words: Chips, Chicken, Chain, Chair, Chop
SH Words: Shorts, Ship, Shoe, Shade, Shovel
TH Words: Think, Thermos, Thief, Thorn, Thread
WH Words: Whistle, Whale, Wheel, Whisk, Wheat
Creating the Resource
Step 1: Create the layout for the sorting mats
Option 1: Copy and paste this layout from my Task Cards Templates (from Build A TpT Store chapter 20).
Option 2:
- Set slide size to 8.5″x11″
- Create 2 rectangles 5.3″x8.2″

Step 2: Create the first sorting mat.
Picnic Basket (width = 2.31″)
Picnic Mat (width = 8″)
‘ch’ text box
- Font: Happy Fun Titles
- Size: 100 pt
- Text Fill: white
- Text Outline: black, width = 2.3 pt
‘words’ text box
- Font: Happy Fun Titles
- Size: 45 pt
- Text Fill: white
- Text Outline: black, width = 1.5 pt

Step 3: Copy and paste to create all 4 sorting mats.
Change the text box for the different beginning digraphs.

Step 4: Create the layout for the task cards.
Option 1: Copy and paste this from my Task Cards Templates (same one as above)
Option 2: Create 12 rectangles of 2.65″x2.7″

Step 5: Create the first task card, then copy and paste the main elements into the other boxes.
Ant (width = 1.2″)
Chips (width = 1.84″)
‘___ ___ ips’ text box
- Font: Happy Paragraphs
- Size: 32 pt

Step 6: Copy and paste the ant and text box to create the template for the remaining task cards

Step 7: Insert the beginning digraphs clipart into all the task cards and edit the text boxes

Step 8: Create the recording sheet layout.
Copy and paste this from my Worksheets Templates (from Build A TpT Store chapter 19).

Step 9: Add title, clipart, and directions to the recording sheet.

Step 10: Add phonics clipart and text boxes to recording sheet.
Clipart comes from my Beginning Digraphs.

Step 11: Add activity title, directions and skill/standards to the Center Cover Template.
Get the PowerPoint template (from Build A TpT Store chapter 20).

Step 12: Add thumbnails to complete the center cover.
For (1) and (2), group all the items in the sorting mat/task cards, right click, Save as Picture.
For (3), export the recording sheet as PNG or JPEG.

Completing the Resource
This can be a standalone activity, or you can combine it with other centers to form a bigger resource.
See Section 4 of Build A TpT Store to create the supporting sections to get your resource ready for sale!
Action Steps
- Create a picnic-themed sorting activity for your targeted skill
- Create a sorting activity in another theme for your targeted skill
