How to Create Digital Resources: Fill in the Blanks (Part 3 – Boom Cards)

As of this post, Boom Learning is one of the only platforms that allow you to create fill-in-the-blank activities that are self-checking. That’s very important because students can receive immediate feedback and students can save time.
(It’s free to get started on Boom Learning, but you’ll need a Publisher membership if you want to sell the Boom Cards that you’ve created.)

Creating the activity in Boom Cards
1. Add a new deck
(If you haven’t checked out Part 1 of this series, head there first to create the flat backgrounds needed for this part.)
On to the Boom Learning website,
- Go to Studio Tab
- Click on Make Decks, and go into Deck Manager page (image below)
- Then click the New Deck blue button

2. Add new cards from images
In the left thumbnails column, click on the the ‘New cards from images’ button.

3. Add all the flat backgrounds
Upload all 7 flat backgrounds created in Part 1.

4. Add a ‘fill in the blank’ box
Next, drag the ‘FILL IN THE BLANK’ box into the deck area (dark blue boxes in the left column toolbar).

5. Resize the ‘fill in the blank’ box
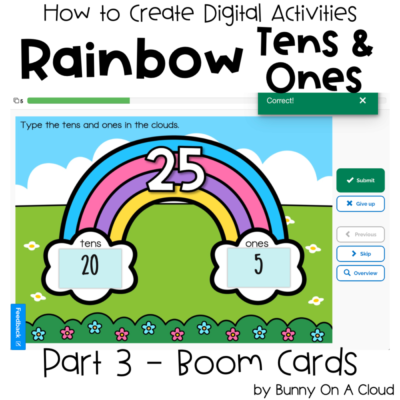
Move the ‘fill in the blank’ box over to the rainbow and resize it using corner arrows. Have the box fit neatly in the rainbow’s cloud.

6. Submit an answer for the ‘fill in the blank’ box
Double click on the ‘fill in the blank’ box and a pop-up window will appear. Type the correct answer into the box and click submit.
This feature can allow for multiple correct answers, though in this case we only need 1 answer.

7. Format the ‘fill in the blank’ box
In the same ‘Answer Picker’ pop-up window, pick out a font and font size. In this example, I used ‘Just Another Hand’ at font size 64.
Also, you can add additional formating by checking boxes like ‘numerical’ and ‘ignore white space’. That means students can only type numbers into this ‘fill in the blank box’, and their answer will still be accepted even if they typed in extra spaces.

8. Test it out
Click on ‘Preview’ and test out the 1st ‘fill in the blank’ box to see how it will look and be sure it works. The box will read ’40’ in edit mode, but will be empty as it should be in Preview mode.

9. Copy and paste to create a second ‘fill in the blank’ box
After confirming the 1st one looks great, copy and paste to create a 2nd ‘fill in the blank’ box. Move the 2nd box into the 2nd cloud on the rainbow. You can use arrow keys on your keyboard to nudge the box into the exact position you want.

10. Copy and paste both ‘fill in the blank’ boxes into every card in the deck
All the pasted boxes should land at the same exact positions in every slide, which makes things really neat. All the boxes will still say ’40’ for now, and in the next step we’ll change the submitted answer for every box.

11. Change the submitted answer for every box
Double click on each answer box and delete the previously submitted answer ’40’ by click on the ‘x’ beside it. Then type the required answer and click submit.

12. Preview and play the entire deck to make sure there are no errors
The deck is about done! To be sure there are no errors, test play the entire deck from start to finish.

13. Name the activity and fill out all the details for the deck
Name the activity, and add in details that will help buyers make their decision!

Next Steps
- Add an Instruction Card to the beginning of the activity
- Create Cover Images that you can use when listing your activity on TpT or Boom Learning
- Create a Product Preview to show your customers more details about your resource
- Create the Final PDF (containing links to the activity) that customers will receive when they purchase your product
You may also want to create this activity in TpT Easel or in Google Slides.
For more inspiration on the types of activities you can create, go to How to Use Clipart!


