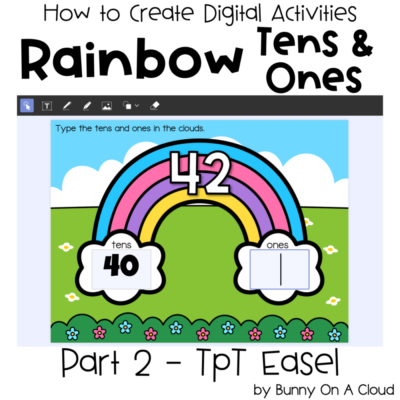
How to Create Digital Resources: Fill in the Blanks (Part 2 – TpT Easel)

In the previous post, we created all the flat backgrounds needed to complete this resource. So in this one we are going to put it together in TpT’s Easel (there’s also a free course to help you become an Easel Certified Seller).
Self-checking? Unlike the previous 2 digital activities tutorials, this activity is NOT self-checking in TpT Easel nor Google Slides, only Boom Cards.

Creating the activity in Easel
1. Create a new activity.
Go to Easel by TpT, click on “Create” (blue rounded button), and then select Activity for listing.

2. Start with PDF
In the pop-up box, choose Start with a PDF and upload the flat backgrounds PDF created in Part 1.

3. Import all pages
Check the “Select All” box. Leave the “Add margins” box unchecked. The margins are great for teachers who wanna add annotations at the side, but we don’t need that.

4. Add an answer box
Click on the answer box icon in the toolbar (2nd icon in the toolbar). Then click and drag, or just click anywhere.
It looks just a rectangle shape with the words ‘Answer Preview’ in it. Make the answer box fit into one of the clouds.

5. Format the answer box
Now decide on the (1) font, (1) font size and (2) alignment that students are going to see when they type.
After some experimentations, I’m going with ‘Luckiest Guy‘ at font size 72. Set the text alignment to middle.
Go into ‘View as Student’ mode to see how it will look to make your final decision.

6. Copy and paste to create a second answer box
When you’re formatting the first answer box, do a copy and paste of it. Have each answer box sit neatly within each cloud of the rainbow.

7. Copy and paste both text boxes into every page in TpT Easel
With the 2 answer boxes selected, hit copy. Then paste them in every page.
In every page, All the pasted boxes should land at the same exact positions, which makes things really neat. No more adjustments needed.

8. View as Student to test out the activity
Now that the activity has been created, it’s time to check that everything is as should be.

9. Name the Activity
When all is well, give the activity a fun name!

Next Steps
- Add an Instruction Card to the beginning of the activity
- Create Cover Images that you can use when listing your activity on TpT or Boom Learning
- Create a Product Preview to show your customers more details about your resource
- Create the Final PDF (containing links to the activity) that customers will receive when they purchase your product
You may also want to create this activity in Boom Cards or in Google Slides.
For more inspiration on the types of activities you can create, go to How to Use Clipart!


