How to Create Digital Learning Resources: Multiple Answer MCQs (Part 1 – Preparations)

This is my second digital resources tutorial! Unlike the first one (Drag and Drop Matching), this series will only come in 4 parts: (1) Preparation (2) TpT Easel (3) Boom Cards (4) Google Slides.
Parts 5 to 8 is not that different for different activities so I’m not going to repeat them from the 2nd digital resource onwards.

Planning the Activity
1. Determine Target Skills and Grade Level
Grade Level: K
Target Skill: Sight Words
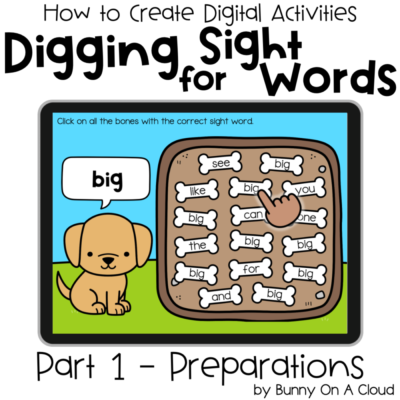
Activity Type: MCQs with multiple answers, each slide will feature a main sight word and students have to select all the options that contain that same sight word.
No. of Task Cards: 9
Decks typically have between 20-30 cards. I’m just going to do 9 for this tutorial.
2. Exact Details/Rigor
Next, plan down to the exact words you use to have on each card/slide. In that way, when you go into creation mode, you don’t have to start and stop to think of what words to put next.
So here are my 9 words:
- Big
- Play
- Red
- Blue
- See
- Like
- You
- Can
- Find
Other filler sight words: one, and, the, get, she, for
Work on the Design
1. Slide Size
Start a new PowerPoint presentation and set up the slide size.
(For the steps, check out my PowerPoint Notes on Working with Slides.)
Name it something like “Digging for Sight Words – prep”. This is going to be the draft.
I’m using 4:3, but there are 3 main sizes you can choose from:
- 10 in x 7.5 in (that’s 4:3 i.e. Standard Size)
- 16:9 (this is popular)
- 7 in x 5 in (recommended Boom Card size)
2. Main Clipart/Theme
In this second activity we are going to use ideas from Containers + Matching Items, from How to Use Clipart.
Main Clipart
I’m going to use Dirt Patch + Dino Bone (from Paleontologist Kids). The dirt patch serves as a container for the bones.
Sizing Decisions
- Decide on the font (Happy Paragraphs) and font size (32pt) for the sight words, and then size the bone to fit the words. Make sure there’s enough room for the longer words too.
- Size the dirt patch based on how you how many bones you want to fit and how big you want the dirt patch to be on the slide
Placeholders
Create a bone+text box group. Duplicate that group and arrange the bones in the dirt patch. The bones will serve as placeholder for now. At a later step we’ll replace the text with the sight words you want.

3. Add Sidebar
Add a character + text box to show students the sight word they need to find for that particular slide.

4. Add Background/Border/Design
Here’s a simple outdoor background.

5. Add Directions + Finishing Touches
As finishing, you can add directions if you like (you can also choose to add an Instruction Card and only put the direction there).

Adding a little tilt to the bones can make them look more natural.
This becomes the template for the next section!
Create the Parts (Mise en Place)
1. Movable Piece
This particular MCQ activity doesn’t require movable pieces, because students can just click on the answers.
Except, for the Google Slides version.
Google Slides was not created for self-correcting clicking games, so it’s going to become a “Find and Cover” activity instead. We’ll need a single movable piece for that.
The movable piece can be anything that covers a word. I’m going to use an oval shape drawn in PowerPoint, with a pick axe clipart layered above it.

2. Create the Flat Backgrounds
There will be 9 flat backgrounds in this tutorial, one for each sight word.
- Create a separate PowerPoint file.
- Use the template created in the previous section, and duplicate it 9 times.
- Change the main sight word in the speech bubble for each of the 9 slides.
- Optional: You can put the puppies in different positions to add more fun and interest.
- Edit the words in the placeholder bones so that 8 bones contain the correct word, and the other 8 contain a mix of other sight words.
- Add your copyright line to the bottom corner of every slide.

OPTIONAL: Depending on how you wrote the directions, you may need to create a separate PowerPoint file for the Google Slides version, because student can’t click on the bones in the Google Slides.

Export the Parts
1. Export the Movable Piece
First, group the oval shape and the clipart together. Then, right click on the group and select ‘Save as Picture’.
See my PowerPoint Notes on Working with Clipart (point 12) for more notes.

2. Export the flat backgrounds
Export as PDF
To create for TpT Easel, export the backgrounds as PDF (File > Export).

Export as PNG
To create for Boom Cards or Google Slide, export the backgrounds as JPEG/PNG, and select ‘save every slide’. Set the export width to at least 1600px.
Next Steps
Put the parts together in one of these platforms:
- TpT Easel (Part 2)
- Boom Cards (Part 3)
- Google Slides (Part 4)
Then after you put the parts together, continue here:
- Instruction Card (Part 5)
- Cover Image (Part 6)
- Product Preview (Part 7)
- Final PDF (Part 8)


