How to Create Digital Learning Resources: MCQ (Part 1 – Preparations)

(Before you do anything, try playing this deck here!)
Welcome to the Digital Activity no. 4! In this activity, we are going to explore using MCQs, one of the simplest tested-and-true learning mechanisms.
Check out my other digital resources tutorials like 3 Little Frogs (Addition to 20), Digging for Sight Words, and Rainbow Tens and Ones. Each of these activities explore a different mechanism through which to create digital resources.

Planning the Activity
1. Determine Target Skills and Grade Level
Grade Level: Kindergarten
Target Skill: Alphabet (lowercase to uppercase)
Activity Type: MCQ
No. of Task Cards: 26 (since it’s alphabet)
2. Exact Details/Rigor
I’m going to make this a lowercase to uppercase recognition activity, and have 1 task card for each alphabet from a to z, in that order.
Teachers using this resource can choose to mix things up, or to assign certain letters within the set. Boom Cards can be automatically shuffled so students complete the activity in random order.
Write a list of your MCQ options like this:
a: H, D, A
b: B, D, P
c: G, Q, C
d: D, R, E
(etc.)
Work on the Theme/Design
1. Slide Size
Set up your slide size before doing anything else. (For more details on this, check out my PowerPoint Notes on Working with Slides.)
I’m using 4:3, but there are 3 main sizes you can choose from:
- 10 in x 7.5 in (that’s 4:3 i.e. Standard Size)
- 16:9 (this is popular)
- 7 in x 5 in (recommended Boom Card size)
2. Main Clipart
For this activity, we are going to take inspiration from Characters and Matching Things.
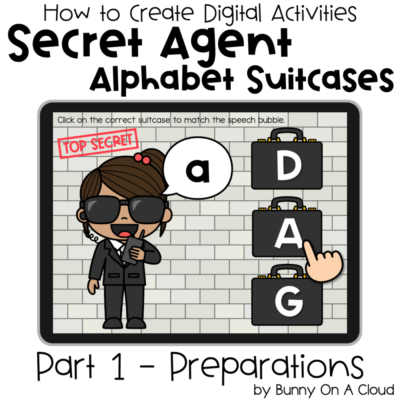
I’m going to choose a Secret Agent character speaking into the walkie talkie, and match the character with a suitcase.
The secret agent character is also going to have a speech bubble so that I can add text into it.
Arrange them in a MCQ kind of way that offers 3 options.

3. Add Text
First, add a text box for the lowercase letters that will appear inside the speech bubble.
Since there is only going to be 1 letter in each speech bubble at a time, make it big. (Happy Titles font at size 120).
Next, add a text box for the uppercase letters that will be on the suitcases.
Make the text white. I’m going to add a drop shadow to the font, even though the effect is small. (Happy Titles font at size 115, fill color white).
You can find the font in my Build A TpT Store Fonts and Clipart Starter Pack.

4. Add Background/Design Elements
Design Element #1: simple brick wall background
Design Element #2: ‘TOP SECRET’ stamp.
You can also use doodle borders, background colors, textures, or even just leave the background empty as is, even though that’s going to look really plain.

5. Add Additional Details
Detail #1: directions
Detail #2: copyright sign

6. Alternative directions for Google Slides version
Do this on a new slide because we need an alternative version of the flat backgrounds for Google Slides.
Change #1: student can’t click to select the correct answer in the Google Slides version, so we are going to add a magnifying glass clipart. Students will move the magnifying glass over their chosen answer to select it (according to my Terms of Use, it is necessary to get an Extended License for Movable Pieces if you intend to use the magnifying glass clipart this way).
Change #2: the directions therefore has to be changed to something like ‘Move the magnifying glass to the correct suitcase’.

Create the Flat Backgrounds
1. Change the lowercase alphabet in the speech bubbles from A to Z.
In a new PowerPoint file, copy and paste in the slide design.
Duplicate the slide to make 26 slides altogether. Then change the lowercase letter in each slide going from a to z.

2. Change the answer options on the suitcases
After changing all the letters in the speech bubbles, now change the answer options in the suitcases according to the list you created in the previous section.

3. Change the secret agent kid character on each slide
This can take a little bit of work. But representation is very important so it’s important to do this.
There are enough kid characters of different poses, ethnicity and abilities in the Secret Agent Kids set to have a different kid representation for each of the 26 slides.
If you want to ensure that the clipart kids will be of the same proportions to each other, use the format pane to set the dimensions by scaling height/width. In this example, the kids are scaled at 16%. See my PowerPoint Notes on Working with Clipart point no. 5.

4. Flat Backgrounds for Google Slides
The flat backgrounds for TpT Easel and Boom Cards are completed in the previous step.
For the Google Slides version, we just need to change the directions.
Duplicate the existing flat backgrounds PowerPoint file to have a separate one for the Google Slides version.
Then copy and paste in the alternative directions into all 26 slides.

Export the Parts
1. Export the flat backgrounds as PDF
*** Update: TpT Easel now allows you to upload PNG/JPEG for the backgrounds so it’s no longer necessary to export the flat backgrounds of PDF. Though if you have lots of pages, like in this activity, PDF can still be easier because TpT Easel only allows you to upload 25 images at a time.
Export as PDF (for TpT Easel)
To create for TpT Easel, export the backgrounds as PDF (File > Export). PDF is already selected as the default file format.

2. Export the flat backgrounds as PNG
Export as PNG (for Boom Cards/Google Slides)
So as noted in the previous section, you need a different set of PNGs for Boom Cards and Google Slides, so you have to export them separately.
Export the backgrounds as JPEG/PNG (you have to change the file format selection). Also select the ‘Save every slide’ button. Set the export width to at least 1600px.

Next Steps
Now that the movable pieces and flat backgrounds have been created, it time to put the activity together on a digital platform.


