How to create Digital Activities: Drag and Drop Matching (Part 3 – Boom Cards)

Although this is Part 3, it actually continues directly from Part 1, which is the preparation part.
If you have never created your own Boom Cards, you’ll be happy to know that you can get started for free! There is a limit on the number of decks you can create on the free membership, but it’s perfect for getting started. (This is my referral link if you are completely new to Boom Cards).
To sell your Boom Cards however, you’ll need to have the Publisher membership. It’s the most expensive membership they offer, but it’s still affordable.

Creating the activity in Boom Cards
1. Add a new deck
On to the Boom Learning website,
- Go to Studio Tab at the top bar
- Click on Make Decks (a square at the bottom of the Studio page), which brings you to the Deck Manager (the page in the image below)
- Then click the New Deck blue button

2. Add new cards from images
In the left most column where all the card thumbnails are, look for the ‘New cards from images’ button and click it.

3. Add all the flat backgrounds
Add in the 5 flat backgrounds that we created in Part 1.

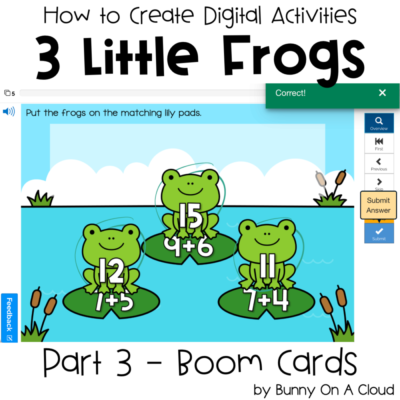
4. Add 1 movable frog clipart
On the left column toolbar (dark blue boxes), drag the ‘IMAGE’ box onto the deck area.
Import and select any frog created in Part 1. The movable frog will serve as a placeholder for now.

5. Resize and duplicate the frogs
Now, resize that placeholder frog to fit nicely. Then duplicate it, so that we end up with 3 little frogs.
Arrange the frogs in holding area we created in Part 1. This is how the starting position will look like.

6. Make all 3 frogs draggable
With all 3 frogs selected, click on the ‘Draggable’ button. It’s on the right toolbar column under ‘Drag/Drop Options’.
After clicking on ‘Draggable’, you’ll see a pointer finger icon on the top left corner of each movable frog.

7. Add a button
Next, drag the ‘BUTTON’ box into the deck area. It’s in the left column toolbar (dark blue boxes). This button will become the drop zone for the frogs.

8. Format the button so that it’s only a transparent rectangle box
Formatting the button:
- Delete the ‘button’ text
- Resize the button to about the size of a frog
- Set background color to no background color (right column toolbar)
- Set border to no border (right column toolbar)
Basically, you want to be left with a box that’s completely transparent with nothing in it.

9. Create the drop zones
Copy and paste to have 3 transparent rectangle box and arrange them above the lily pads.
With all 3 boxes selected, click on ‘Drop Zone’. It’s right beside ‘Draggable’ on the right toolbar column.
You should see a flag icon on the top left corner of each drop zone.

10. Copy and paste all 6 items to every card on the deck
With the setup in place (3 movable frogs + 3 drop zones), duplicate all 6 items onto each card.

11. Put in all the correct frogs.
Almost everything is in place now. Now swap in the frogs with the correct numbers.
Use the ‘Change Image’ function to put in the frogs with the correct numbers for each card in the deck. It is found under ‘Image Tools’ in the right column toolbar.

12. Link all the frogs to the correct drop zone.
Now to link each frog to the correct drop zone, click on that pointer finger and drag only very slightly. The pointer finger is going to move disproportionately more than the distance you are dragging (at least that’s what happens for me).
Move the pointer finger to the flag icon of the correct drop zone. You will see a blue line joining the pointer finger to flag once you’ve connected them.
Repeat this for each movable frog.

13. Preview and play the entire game to make sure there are no errors
Now it’s done! To be sure there are no errors, play through the entire game yourself.

14. Name the activity and fill out all the details for the deck
Name the activity and start adding helpful details.

Next Steps
You can check out creating this activity in Google Slides or TpT Easel if you haven’t already, or you can straight to Part 5 to create the instruction card.


