How to Create Digital Activities: Drag and Drop Matching (Part 1 – Preparations)

Digital learning resources have become a very important part of our lives and they are here to stay. So I’m gonna make a very long series of tutorials to give you ideas and steps on how you can create different types of digital resources.
Each digital activity explored in my blog will get 4 posts: (1) Preparation (2) TpT Easel (3) Boom Cards (4) Google Slides.
This being the very 1st activity it’s gonna get 4 additional posts: (5) Instruction Card (6) Cover Images (7) Product Preview (8) Final PDF.

Planning the Activity
A little planning goes a long way to saving time and energy!
1. Determine Grade Level and Target Skill(s)
Grade Level: 1
Target Skill: Addition to 20
Activity Type: Drag and Drop + Matching
No. of Task Cards: 5, since it’s only for demonstration purposes (Typical decks have between 20-30 cards. This particular deck though, there are 3 questions per slide, so you may not need that many cards.)
2. Exact Details/Rigor
Next, plan down to the exact letters/numbers/words you want to have on each card/slide. In that way, when you go into creation mode, you don’t have to start and stop to think of what numbers to put next.
A table can be great for this. Add as many rows as you need so that each task card gets its own row.
| Card no. | Matching 1 | Matching 2 | Matching 3 |
| 1 | 6+7 = 13 | 7+8 = 15 | 8+9 = 17 |
| 2 | 4+8 = 12 | 5+9 = 14 | 6+10 = 16 |
| 3 | 5+6 = 11 | 9+9 = 18 | 7+9 = 16 |
| 4 | 6+6 = 12 | 8+6 = 14 | 9+4 = 13 |
| 5 | 7+5 = 12 | 9+6 = 15 | 7+4 = 11 |
Work on the Design
1. Slide Size
Start a new PowerPoint presentation and set up the slide size. Name the file something like “3 Little Frogs – prep”.
I’m using 4:3, but there are 3 main sizes you can choose from:
- 10 in x 7.5 in (that’s 4:3 i.e. Standard Size)
- 16:9 (Standard Size)
- 7 in x 5 in (recommended Boom Card size)
For more notes on this, check out my PowerPoint Notes on Working with Slides.
2. Main Clipart + Text Boxes
Clipart
Since we are making a matching activity, look out for Matching Things clipart.
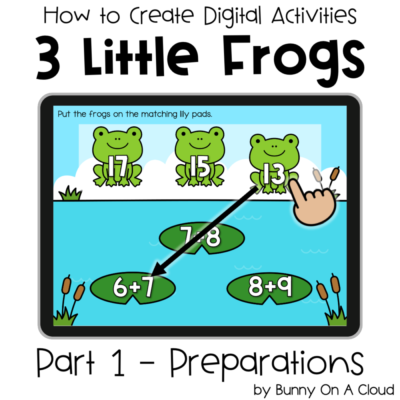
In this case, we are using Frogs + Lily Pads.
Size them up roughly, depending on how many items you are planning to fit in a slide.
Text Boxes
In this example, we are using Happy Covers (from my Fonts and Clipart Starter Pack) at font size 80, white fill color, with text outline.
For more notes, see my PowerPoints Notes on Working with Texts.
Don’t spend too much time here. You can always make adjustments to this at a later step.

3. Add Background/Border/Design
In this example, let’s use a Pond Background. Other design options include: doodle borders, background colors (two-tones maybe), textures, or even just leave it empty.

4. Create what ‘finished’ looks like
You only need to make one slide first.
Play around with the layout. Think of how many frogs you want on each slide. Figure out the exact size and arrangement of all the clipart pieces and text boxes on the slide. How is the slide supposed to look after the students have completed the card?

5. Arrange all the elements to what ‘start’ looks like
Finally, move things around to what the beginning will look like. That is what the students will see before they start working on it.
New element 1: A long rectangular box (white fill, no border, 40% transparency, 8.26 in x 2.3 in) to be the holding area for the movable frogs.
New element 2: Text box for directions. If you don’t have space for directions, you can just add an instruction card to the front of the deck.

6. Name the Activity
3 Little Frogs (Addition to 20)
Create the Parts (Mise en Place)
Now to start creating all the pieces we’ll be using in the actual activity.
1. Movable Frogs
Movable Pieces are the clipart that students drag around to complete their tasks. In this activity, we’ll need Frogs 11-19.
Earlier, we created frogs with text overlay. Group them together.
Add a new blank slide and lay the frogs out (copy and paste) like they are on a cookie tray. Change the numbers in the text box so that they go from 11 to 19.

2. Flat Backgrounds that hold all the non-movable parts.
Everything else on the ‘start’ slide that isn’t movable will go into the flat background.
Create these on a separate PowerPoint file to make them easier to export. Name the file something like “3 Little Frogs – flat backgrounds”. It will look something like this:

Each digital task card in this activity will get its own flat background. Duplicate the slides for the number of task cards you need, then change the numbers on the lily pad according to what you have planned for each task card.
Add your copyright line to the bottom corner of every slide.
Export the Parts
1. Export the Movable Frogs
Group each frog if you haven’t already.
For each frog, right click > Save as Picture. Make sure to select the entire group, not select within the group.

Save it as PNG format. That means you will not have white background around your movable clipart. If you save the frogs as JPEG, you will see a white rectangular background around the frog when you add them to your backgrounds.

For more notes on how to save export the movable clipart, see my PowerPoint Notes on Working with Clipart (point 12).
2. Export the flat backgrounds
Export as PDF
To create for TpT Easel, export the backgrounds as PDF (File > Export)

Export as PNG
To create for Boom Cards, Google Slide, etc, export the backgrounds as JPEG/PNG, and save every slide. Set the export width to at least 1600px.
Next Steps
Now you have all the pieces you need. Go to the next part for steps to put the activity together.


