How to Create Digital Activities: Drag and Drop Matching (Part 2 – TpT Easel)

Welcome to Part 2! This is a continuation from Part 1 – Preparation.
Part 1 was done on PowerPoint, and Part 2 of this tutorial will be done completely on TpT’s Easel website. Easel is really cool, and it’s constantly evolving to add more self-checking features to save time for teachers.
It’s free to create on it, and there is also a free course to help you become an Easel Certified Seller.

Creating the activity in Easel
1. Create a new activity.
On the Easel website, click on “Create” (blue button) and select Activity for listing.

2. Start with PDF
A pop-up box will ask you to choose from 2 options: (1) Start with a PDF, or (2) Create a Blank Activity.
Choose “Start with a PDF”, and upload the flat backgrounds PDF created in the previous post.

3. Import all pages
At this step, you have an option to import only selected pages from the PDF. In this case, upload all five.
You also have a choice if you’d like to add margins. In this case, no.

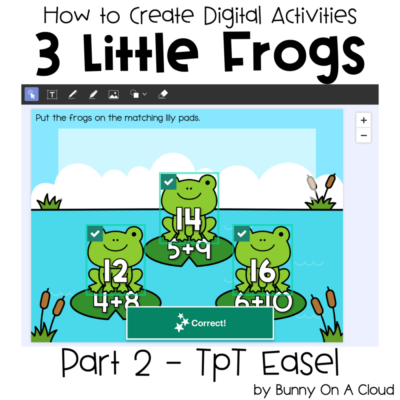
4. Add 1 movable frog image
On the toolbar at the top, click on the image button to add image.
Just add 1 movable frog image for now.

5. Resize and duplicate the frogs
Resize the 1st frog. When you are happy with it, duplicate it twice more. They don’t have the right numbers yet, just use them as placeholders for now.
Then arrange the frogs on the holding area. Use the arrange button, select “Align Middle” and “Distribute Horizontally”.

6. Add a rectangle shape
Click on the shape tool in the toolbar. Select the square shape to draw a rectangle. Have it about the size of one frog.
This rectangle will become the drop zone.

7. Remove the border of the rectangle
Click on the rectangle you created, select the border (pencil) tool, and click on the “slash”. That removes the border from the rectangle.

8. Set the rectangle as a drop zone
Click on that rectangle, then select the 1st tool from the mini toolbar above it. Then select “Drop Zone” from the menu that drops.

9. Copy and paste to make 2 other drop zones
Copy and paste the 1st drop zone. The copies of the zone will automatically rename itself. Arrange the drop zones above each lily pad.

10. Copy and paste the setup to every slide
Select all 3 drop zones and 3 movable frogs, then copy and paste them to every page on your deck.
[Caution!] Error messages may start popping up because nothing has been assigned to the drop zones yet. You can randomly assign the frogs for now to remove the errors messages, or simply ignore the error messages temporarily.

11. Replace the placeholder frogs
Select 1 frog image at a time to “Replace Image”. This is the time to swap in the frogs with the correct numbers for each page by choosing the correct movable frog that we exported in the previous post.

12. Assign each frog to the correct drop zone
After you put in the frogs with the correct numbers on each page, now assign each one to the correct drop zone. Click on the frog, and then the 1st button on the mini toolbar, then select the drop zone according to which lily pad it is on.

13. View as student
The main activity is done! Now click “View as Student” at the top bar and test out every page to make sure that everything runs smoothly.

14. Name the activity
Once you’re done testing, name the activity!

Next Steps
Either go on to Part 3 or 4 to create this activity on another platform, or go to Part 5 to create the supporting sections for your digital activity.


